Before you can start performing Active Directory security assessment you are required to perform an Active Directory discovery to fetch AD Sites, Domain Controllers, and domains in the Active Directory Forest. The process will also check connectivity to all domain controllers to ensure all domain controllers are reachable to perform a complete assessment and to ensure all domain controller checks can be executed successfully on all domain controllers.
The AD Discovery process requires connectivity to all AD Domain controllers and should be able to execute successfully in order to run all AD Tests. The following requirements need to be met for AD Discovery and assessment:
To start the Active Directory discovery process, click on “AD Discovery” button in the left pane and then click on “Run AD Discovery” button.
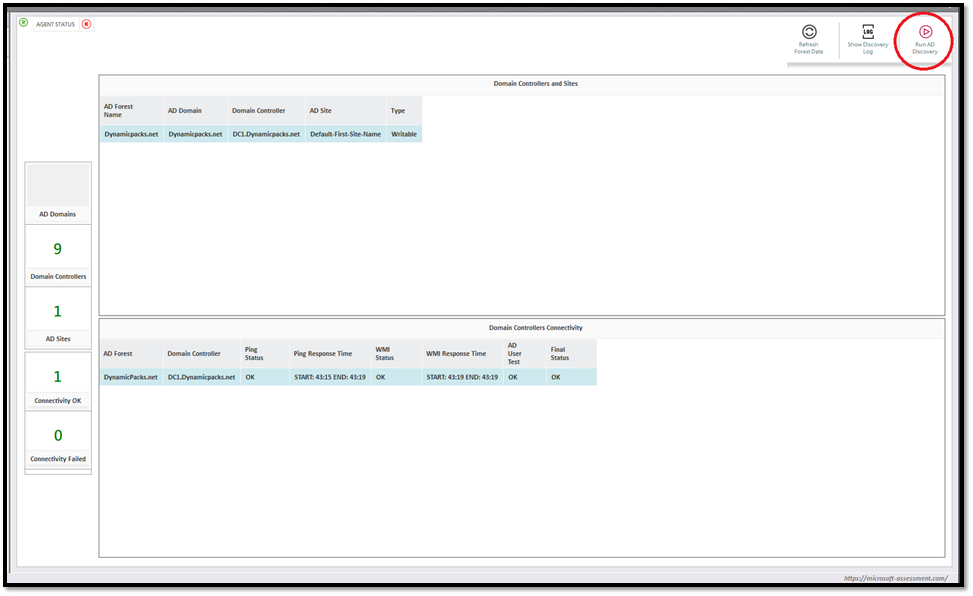
The process will discover all AD sites and check the domain controller connectivity to ensure all domain controllers are reachable. Once the discovery is completed you will see data in the discovery panel.
Once discovery is successful make sure:
Once the AD Forest is discovered successfully, it’s time to execute AD Assessment. Click on “ASSESSMENT DASHBOARD” button to open execution console. Once you open execution console you will see SmartProfiler Console as shown in the screenshot below:
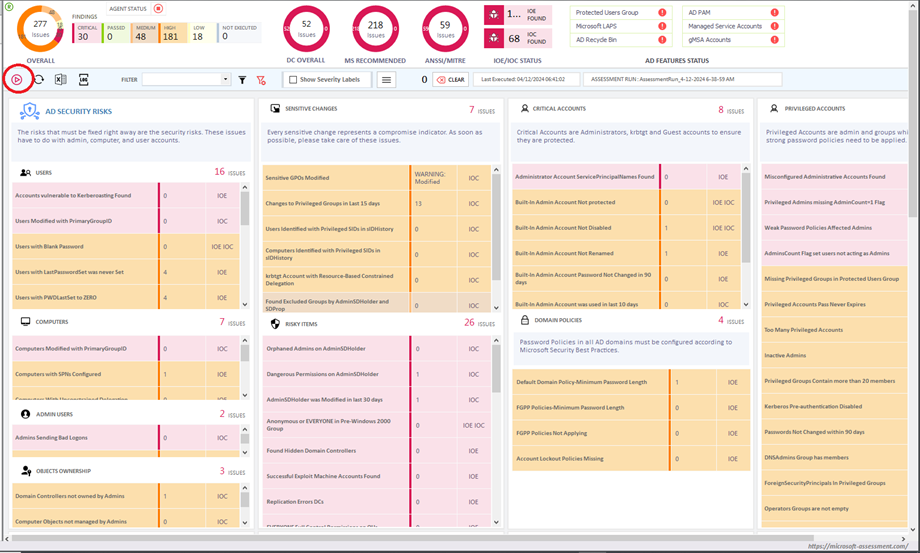
In the screen above, click on “PLAY” icon, marked in red circle, to show the execution window:
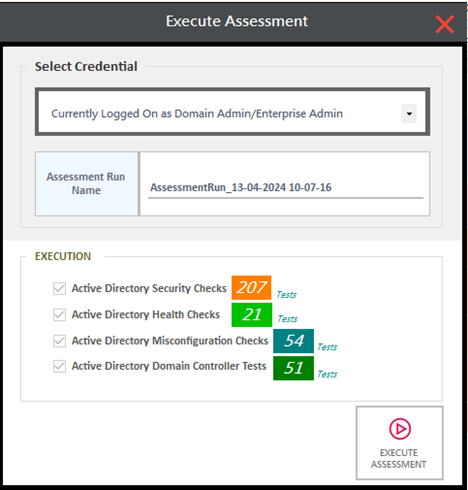
SmartProfiler supports multiple “Assessment Runs”. An Assessment Run records the issues reported during the assessment. By default, the assessment run is named as follow:
“AssesssmentRun_{Current Date and Time}”
In the “Select Credential” option, you are provided with three credential options:
Note: If you run Assessment under credential, please do not install SmartProfiler on Domain Controller. Installing SmartProfiler on a Domain Controller will fail to execute some tests if assessment is executed using credential option.
Note: We have also noticed that running AD Assessment using credential option takes more time.
In the execution screen window, click on “Execute Assessment” button to start the assessment. When you click on the “Execute Assessment” button a popup window will appear to confirm the execution.
When the assessment is in progress you will see the execution progress in the same window.
Once execution is completed the assessment dashboard will refresh automatically.
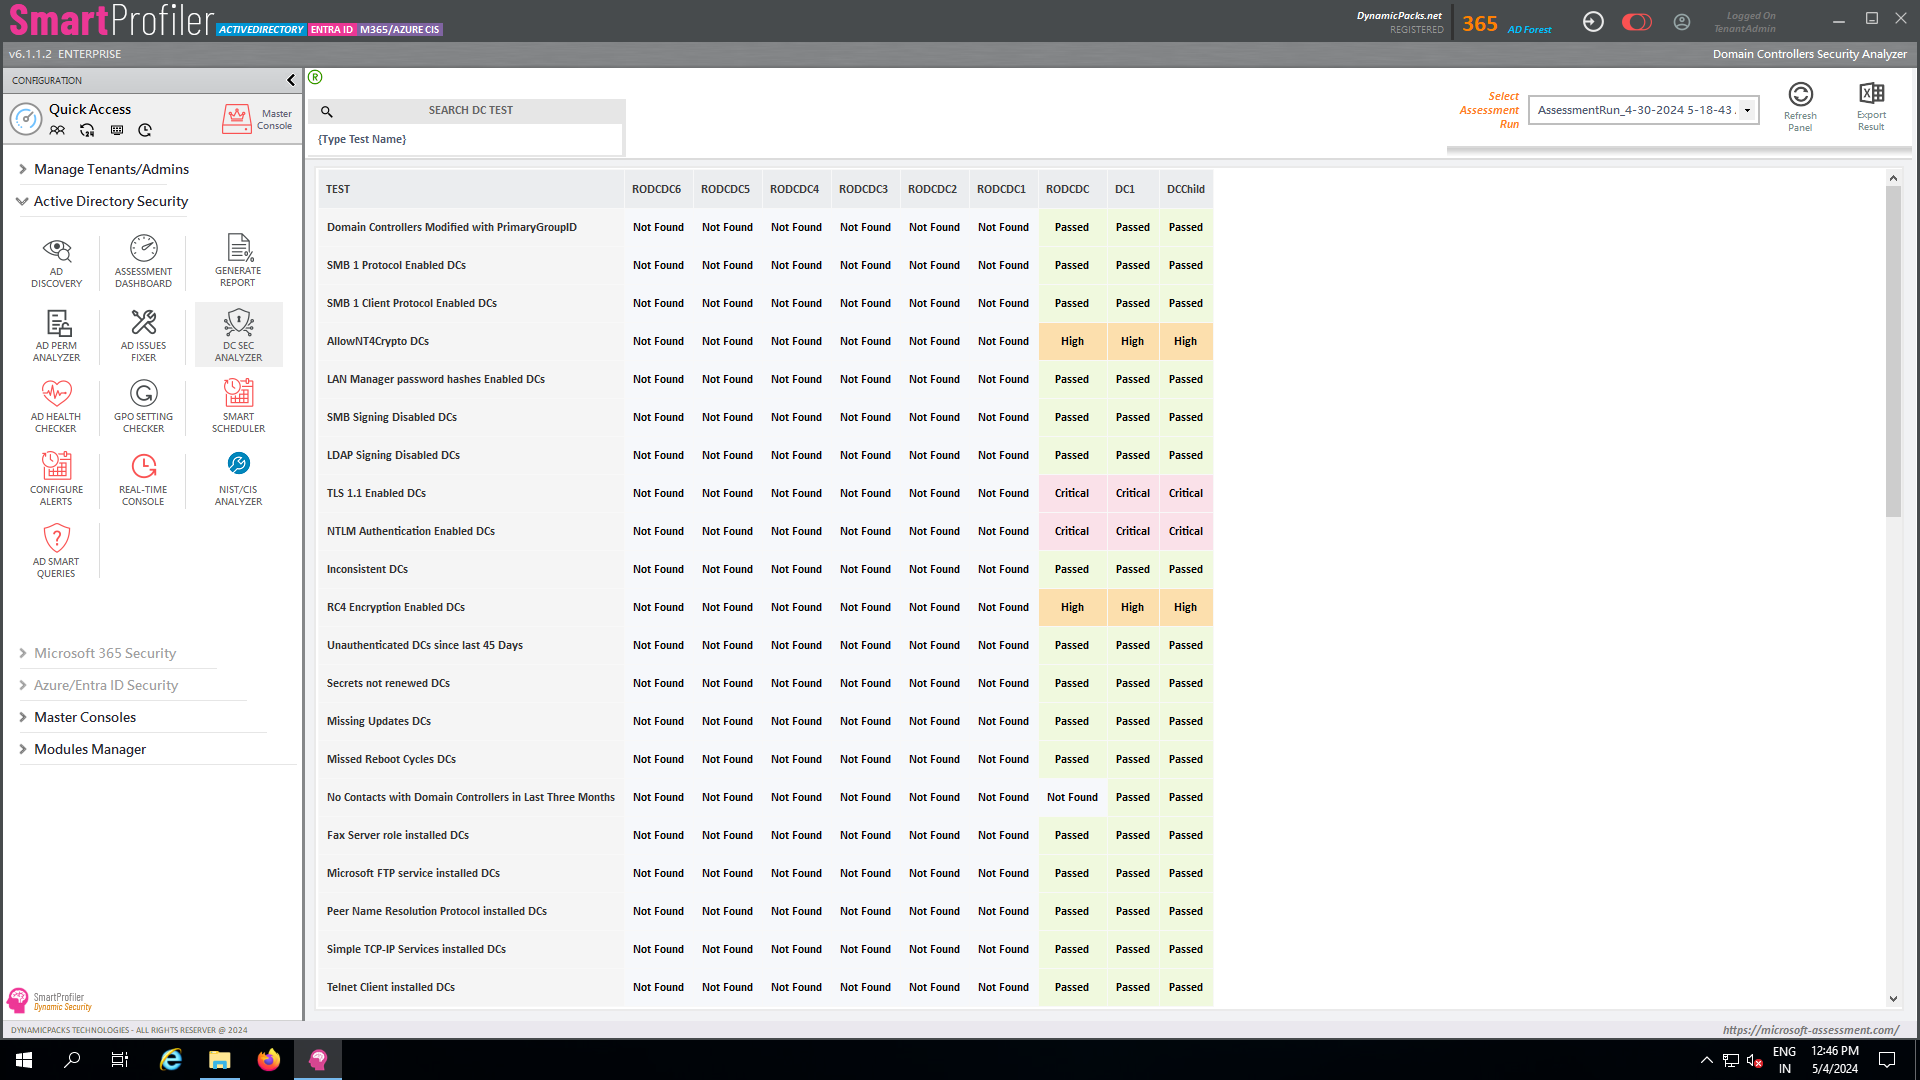
Once the AD Assessment is completed successfully, you can see overall issues and other issues found as explained below:

Top Status bar:
In the top status bar, you can see overall status of Active Directory environment. You can see all critical, high, medium, low, passed and not executed items.
In “DC OVERALL” you can see domain controller status. The DC OVERALL will show number of issues reported for Domain Controllers and passed items.
In “MS RECOMMENDED”, you can see the total number of Microsoft Recommended issues reported and passed items.
In “ANSSI/MITRE”, you can see the total number of tests that have been failed which belong to ANSSI and MITRE categories.
In “IOE”, you can see the total Indicator Of Exposure found in Active Directory.
In “IOC”, you can see the total Indicator Of Compromise found in Active Directory.
In “AD FEATURES STAUTS”, you can see if you have particular feature installed/available.
Filtering Issues:
To filter issues, you can select a filter item and then click on Apply (Black Color) icon:
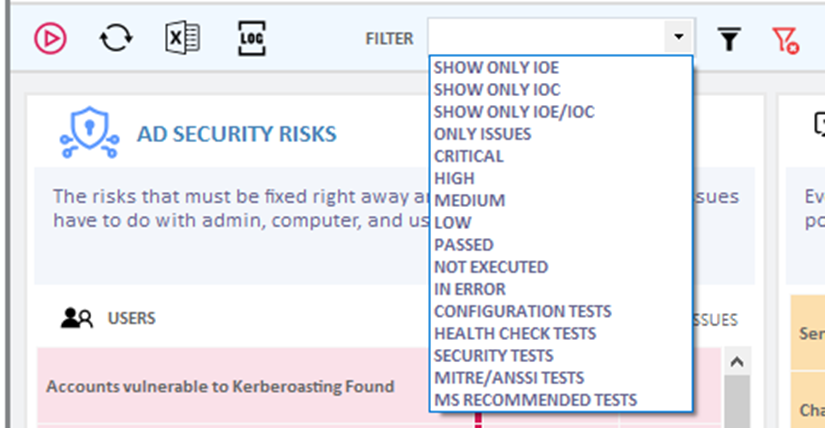
To reset filter, click on Reset (Red Color) icon.
Show/Hide Test Attributes:
You can show or hide test attributes. If you would like to show the severity labels of all the tests then click on “Show Severity Labels” check box as shown in the screenshot below:
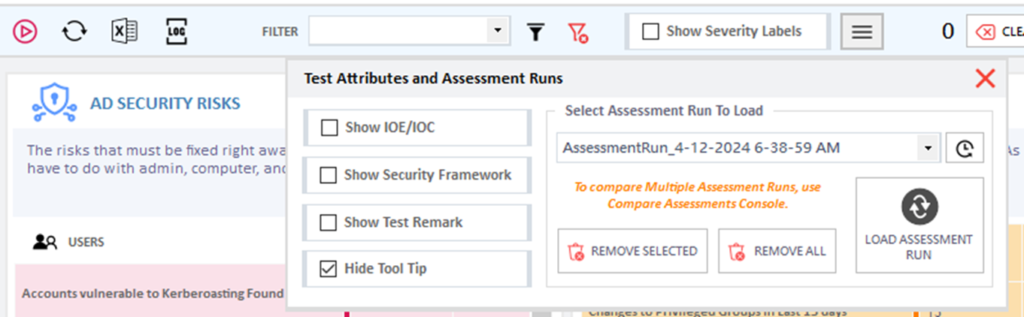
If you would like to see “Security Framework” and “Test Remark” then click on “Show Security Framework” and “Show Test Remark” checkboxes.
In the same screen, you can load a different Assessment Run to see the results from the Assessment Run. In the “Select Assessment Run To Load” dropdown, you need to select the assessment run and then click on “Load Assessment Run” button to load the data from selected assessment run.
Checking Test Details:
To see details of a particular test, you can click on the test, which, in turn, will show the details about the test as shown in the screenshot below:

As you can see in the screenshot above, it shows the result for test “Changes to Privileged Groups in last 15 days”. The result shows the affected objects list and Impact and Recommendation. To see the impact and recommendation you need to switch to “IMPACT/RECOMMENDATION” tab.
You can modify severity, impact and recommendation of each test. Once you have modified the severity of the test click on Apply button to apply to test. The modified severity, impact and recommendations will be included in the final AD Report when you generate.
Once Assessment is executed, you can generate an actionable report. Please note that to generate a report you are required to install Microsoft Word and Microsoft Excel on the SmartProfiler computer.
To generate report for Active Directory Assessment that you just performed click on the “GENERATE REPORT” button in Left Pane, which, in turn, will open reporting window as shown in the screenshot below:

Please note you can generate two types of reports for Active Directory Assessment as explained below:
Note: If you would like to include Comparison of “two” Assessment Runs, then ensure the required CSV has been generated from “Compare Assessments” console before generating the report. You will need to provide the compare CSV as an input so comparison can be included in the final report.
Including Compare Assessment result in Report:
To include the compare assessment result in report, ensure to check “Include Comparison Assessment” and then click on “Browse” button to select the CSV file that you exported as part of the Compare Assessments.

You can include just summary of two assessment runs in the report or show status of each item in each Assessment Run. To just include the summary, click on “Only Include Summary” and to include each item’s status click on “Include Each Item” radio button.
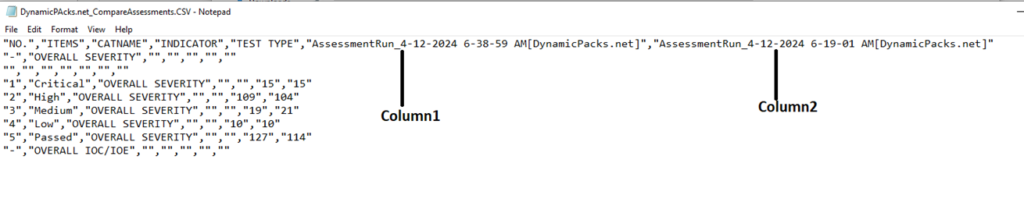
Next, you will need to provide the Compare Assessment Column Name from CSV. Open the exported compare assessment CSV file and then copy the name of Column1 and Column2 and then input in “Specify Column1” and “Specify Column2” fields.
We recommend that you provide inputs to fields such as Report Title, Project-Name, Customer-Name, etc. in order to generate a report with all these details. Once you are ready to generate report click on “Generate Report” button. Once the report has been generated and since it’s in the Microsoft Word format, you can modify the report to include your company logo and other details as necessary.
Note all the tests that SmartProfiler for Active Directory executes as part of the Active Directory Security Assessment are recommended by ANSSI, MITRE, and Microsoft.
Try SmartProfiler, a unified tool to help with security evaluation across many Microsoft technologies.